Drip Edge Flashing: Why It Matters & 6 Install Tips
When it comes to protecting your roof’s edges, drip edge flashing plays a much bigger role than many homeowners realize. This simple metal component is installed along the edges of your roof to guide water away from the fascia, decking, and foundation.
- Prevents water intrusion: Directs rainwater into the gutters instead of behind them.
- Protects roof decking: Shields vulnerable wood edges from rot and deterioration.
- Improves roof lifespan: Supports overall system performance during heavy rain and wind.
While it may seem like a small detail, drip edge flashing is a critical part of a properly installed roofing system. Below, we’ll explain why it matters and share six important installation tips.
What Is Drip Edge Flashing?
Drip edge flashing is a metal strip, typically made from aluminum, galvanized steel, or copper, installed along the eaves and rakes of a roof. It is shaped with a small outward-facing lip that directs water away from the fascia board and into the gutter system.
Without drip edge flashing, water can seep underneath shingles and soak into the roof decking or fascia. Over time, this can lead to wood rot, mold growth, peeling paint, and even structural damage. Modern building codes in many areas now require drip edge flashing for new roof installations because of its importance.
Why Drip Edge Flashing Matters
Your roof is designed to shed water downward, but gravity alone isn’t always enough to ensure proper drainage. Wind-driven rain can push water sideways or upward, and surface tension can cause water to cling to the underside of shingles. Drip edge flashing helps break that tension and ensures water drips cleanly into the gutter.
In addition to directing water, drip edge flashing helps protect against pests and insects. By sealing gaps along the roofline, it prevents small animals from accessing the roof deck. It also improves the finished appearance of your roof, creating a clean and defined edge.
Over time, roofs without properly installed drip edge flashing often show signs of premature deterioration at the edges. This is one of the most common areas where water damage begins.
6 Install Tips for Drip Edge Flashing
Proper installation is just as important as having drip edge flashing in the first place. These six tips highlight best practices that ensure long-term protection and performance.
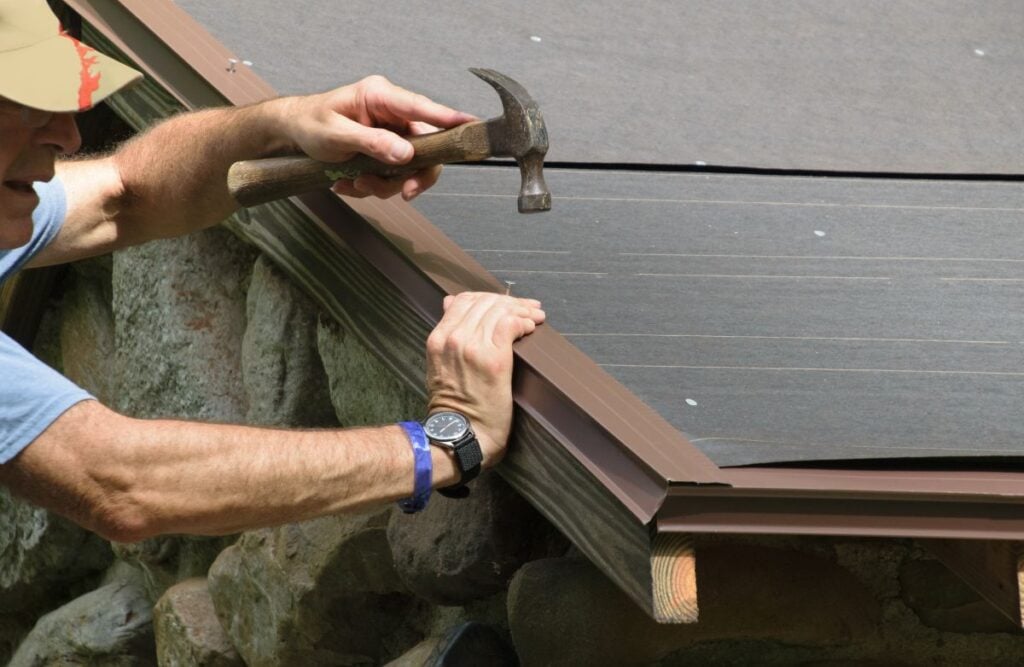
1. Install Drip Edge at the Eaves First
- Correct sequencing: Drip edge should be installed along the eaves before underlayment is applied.
- Proper layering: Underlayment should overlap the eave drip edge to guide water outward.
- Prevents water backup: Ensures water flows toward the gutter rather than behind the fascia.
Installing in the correct order ensures water is directed outward and not trapped beneath roofing materials.
2. Install Drip Edge Over Underlayment at the Rakes
- Different placement: Along the rake edges, drip edge should go over the underlayment.
- Wind protection: This placement prevents wind-driven rain from lifting shingles.
- Layer control: Proper layering reduces the chance of moisture intrusion.
Understanding the difference between eaves and rake installation is key to preventing edge leaks.
3. Overlap Sections Properly
- Minimum overlap: Drip edge pieces should overlap at least two inches.
- Prevent gaps: Proper overlap prevents water from slipping through seams.
- Maintain alignment: Keep edges straight for both function and appearance.
Incorrect overlap is a common cause of water infiltration along the roofline.
4. Secure with Appropriate Fasteners
- Use roofing nails: Fasteners should be corrosion-resistant and properly spaced.
- Avoid overdriving: Nails should sit flush without warping the metal.
- Consistent spacing: Typically placed every 8 to 12 inches for stability.
Proper fastening ensures the drip edge remains secure during strong winds and temperature shifts.
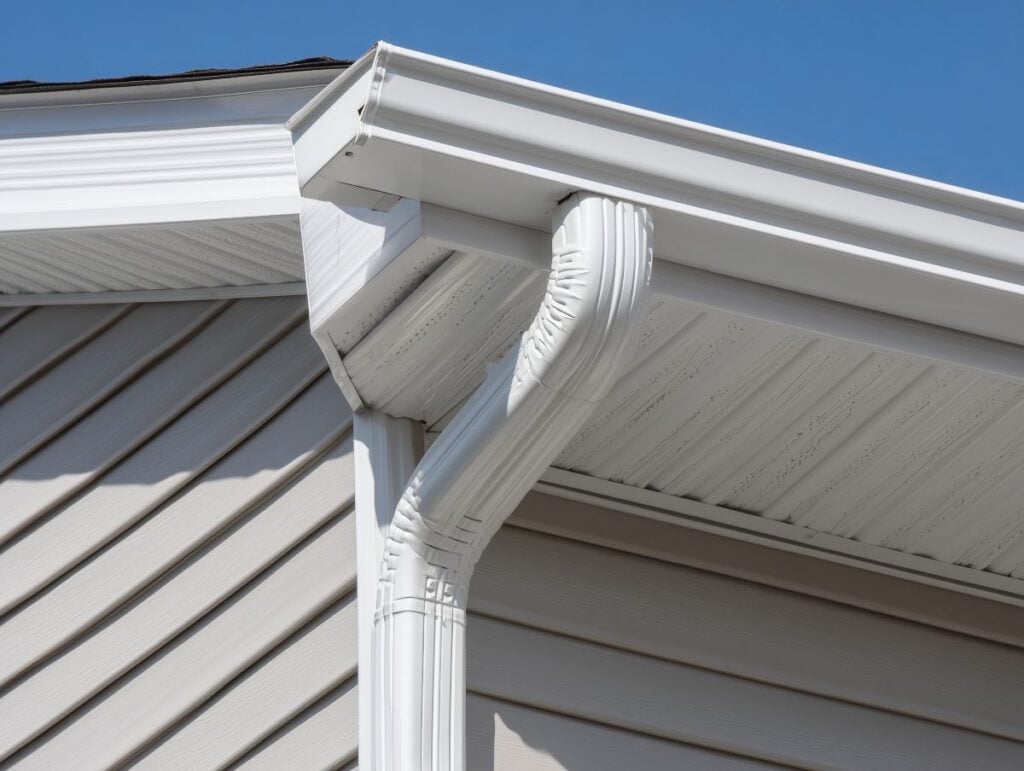
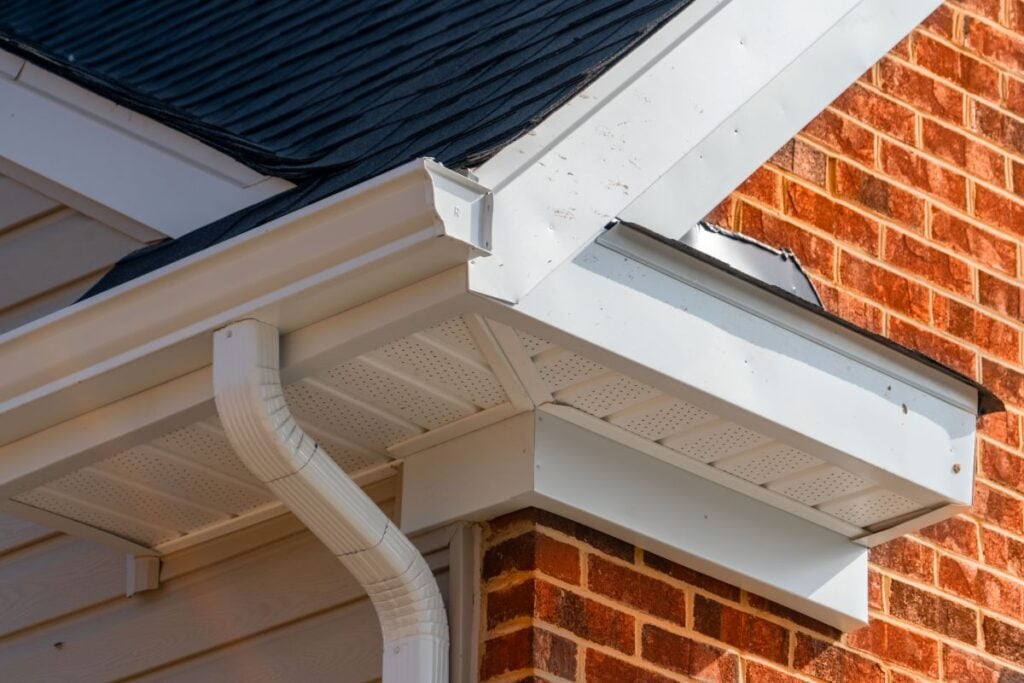
5. Extend Into the Gutter
- Direct flow: Drip edge should extend slightly into the gutter channel.
- Prevent fascia damage: This keeps water from running behind the gutter system.
- Align carefully: Improper positioning can defeat the purpose of installation.
This small detail makes a big difference in keeping water where it belongs.
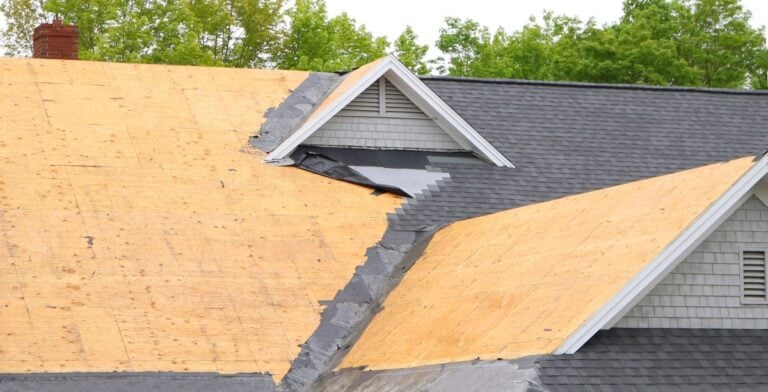
6. Inspect for Damage During Roof Replacement
- Replace old flashing: Reusing damaged drip edge can compromise a new roof.
- Check for corrosion: Rusted sections should always be replaced.
- Match materials: Ensure compatibility with shingles or metal roofing systems.
Drip edge flashing should never be an afterthought during roof replacement projects.
Common Problems Caused by Missing or Improper Drip Edge
Homes without drip edge flashing often experience peeling paint along the fascia, soft or rotting wood, and water stains beneath the roofline. Over time, moisture can infiltrate the roof decking and lead to mold growth in the attic.
Improper installation can also cause water to bypass the gutter system entirely. This results in water pooling near the foundation, which increases the risk of basement leaks and soil erosion. In colder climates, missing drip edge flashing may even contribute to ice dam formation along the eaves.
These problems are often preventable with correct installation and routine inspection.
How Drip Edge Flashing Supports the Entire Roofing System
Although it’s a relatively small component, drip edge flashing works alongside shingles, underlayment, and gutters to form a complete water management system. When installed properly, it reinforces the roof’s first line of defense against moisture.
It also enhances wind resistance by securing the edges of shingles, preventing uplift during storms. By protecting the most vulnerable areas of your roof, drip edge flashing contributes to a longer overall roof lifespan and fewer repair needs over time.
Small Detail, Big Protection
Drip edge flashing may not be the most visible part of your roof, but it plays a critical role in protecting your home from water damage. From guiding rain into the gutters to shielding the roof deck and fascia, this simple metal component helps preserve the integrity of your entire roofing system.
Capstone Roofing Inc. is committed to ensuring every detail of your roof is installed correctly and built to last. Contact us today to schedule a free inspection and make sure your roof edges are properly protected.

4.8 RATING
5.0 RATING
A+ RATING