What Is Roof Flashing? (Types, Installation & More)
Roof flashing is one of the most important components of a durable roofing system, even though it’s often overlooked. Designed to prevent water from seeping into vulnerable areas of your roof, flashing plays a critical role in long-term protection, especially during storms or heavy rain.
- Water damage prevention: Flashing helps seal areas around chimneys, skylights, vents, and valleys.
- Extended roof life: Properly installed flashing keeps water out, reducing the risk of mold, rot, and premature roof failure.
- Professional installation matters: Quality flashing installation makes the difference between a leak-free roof and costly repairs.
Let’s explore the different types of roof flashing, how it’s installed, and more!
Why Roof Flashing Is Essential
Roof flashing acts as a sealant for areas where the roofing material intersects with other surfaces, such as walls, dormers, chimneys, or valleys. These intersection points are the most vulnerable spots for leaks.
Without flashing, even the best shingles can’t stop water from working its way underneath the roofing system. Over time, this leads to issues like:
- Mold growth in attics and walls
- Rotted roof decking or rafters
- Interior ceiling stains
- Compromised insulation
- Expensive structural damage
That’s why Capstone Roofing ensures all flashing is installed with precision and quality materials—no shortcuts.
Common Types of Roof Flashing
There are several types of flashing, each serving a specific purpose. Here are the most common types we use during roof installations and repairs.
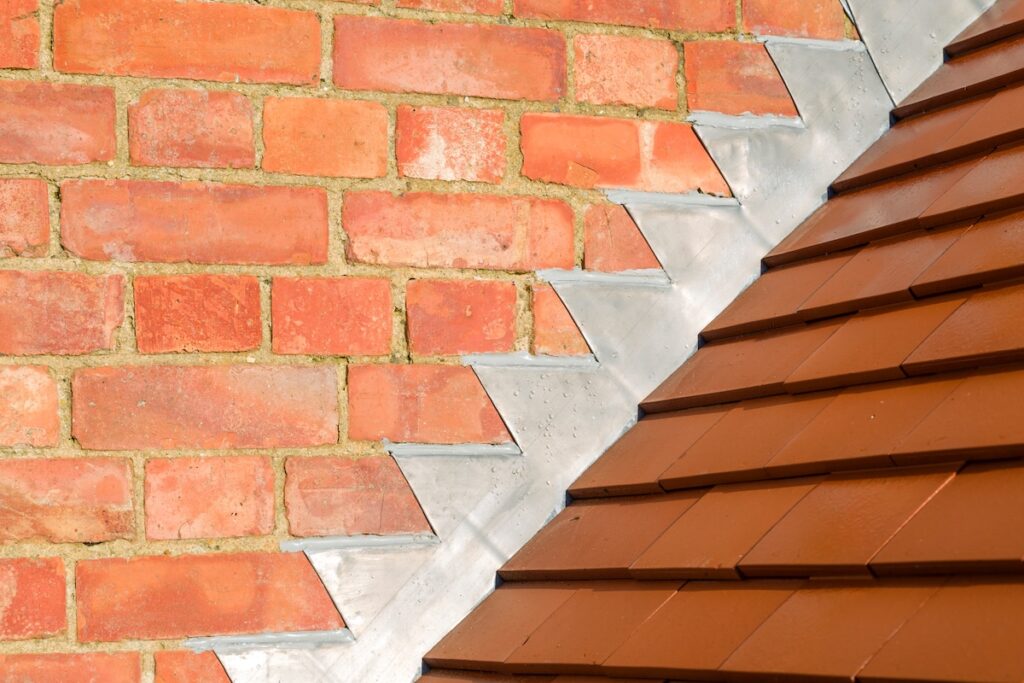
- Step Flashing: Step flashing is used where a sloped roof meets a vertical wall, like along dormers or sidewalls. It’s installed in layers with the shingles, “stepping” up the wall to direct water down and off the roof.
- Counter Flashing: Counter flashing is placed over step flashing and is typically installed into masonry walls or chimneys. It helps seal the top of the flashing system and prevents water intrusion behind the step flashing.
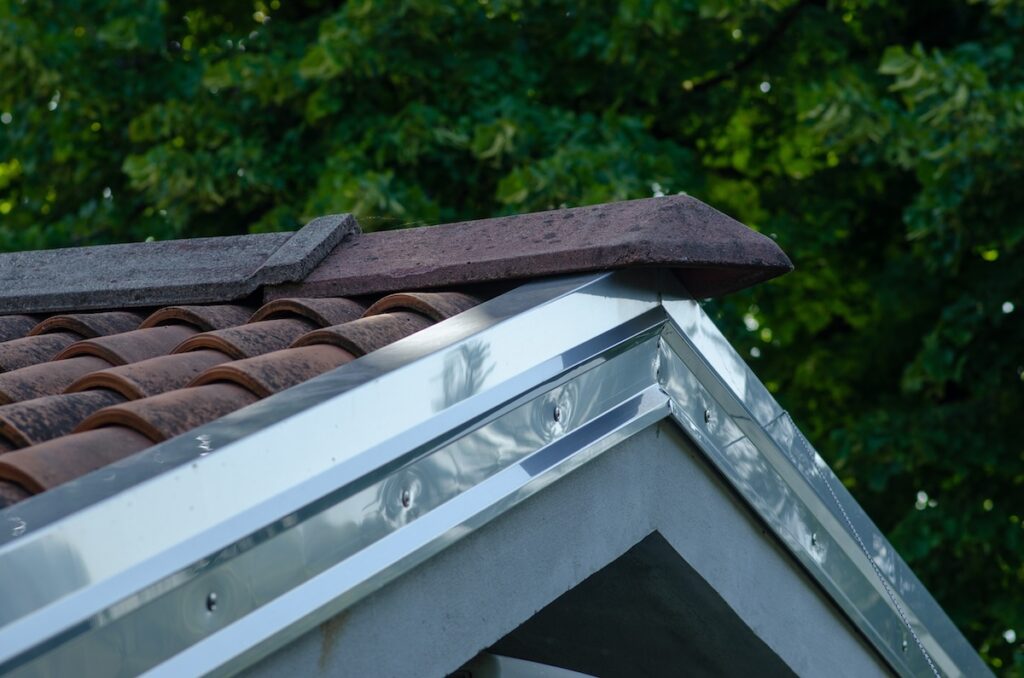
- Valley Flashing: This type of flashing is installed in roof valleys—where two slopes meet. Valleys collect a high volume of rainwater, so durable metal flashing helps direct water off the roof efficiently without pooling or leaking.
- Drip Edge Flashing: Drip edge flashing runs along the edges of your roof, under the shingles. It keeps water from dripping behind the fascia boards and directs it into your gutters instead.
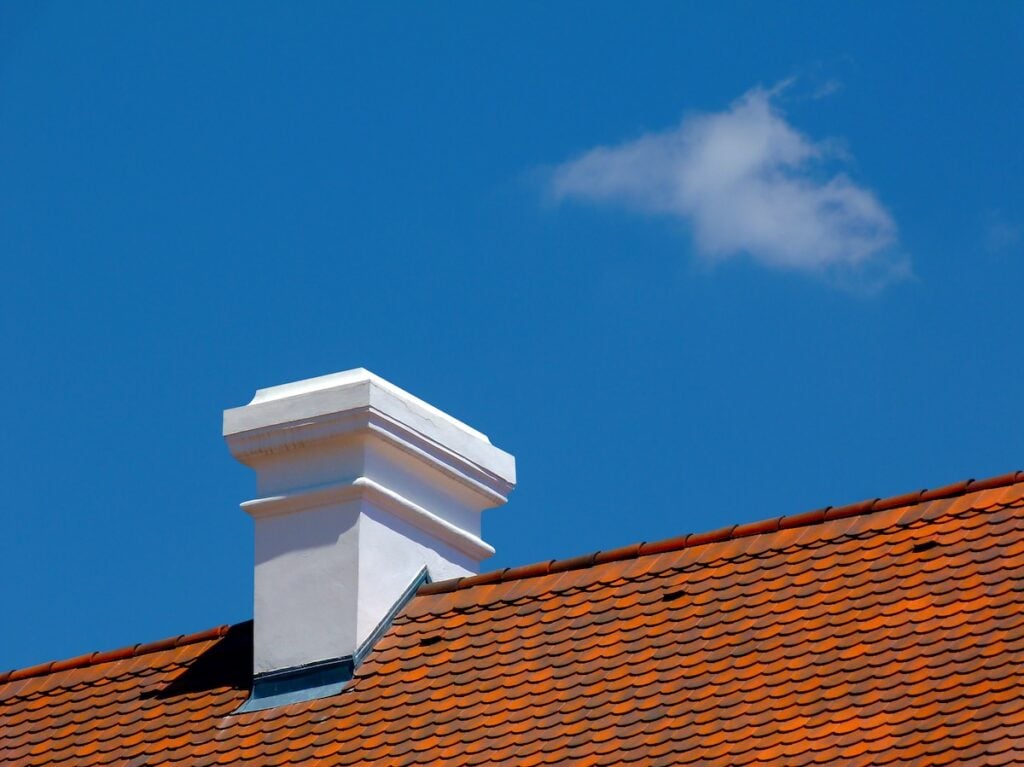
- Chimney Flashing: Chimneys are prone to leaks without proper flashing. This includes a combination of step flashing, counter flashing, and saddle flashing (used behind the chimney to divert water around it).
- Vent Pipe Flashing: Special flashing is used where plumbing vent pipes exit the roof. These are usually rubber or metal boots that seal tightly around the pipe and integrate into the surrounding shingles.
- Skylight Flashing: Skylights require custom flashing kits to seal the edges where the skylight frame meets the roof surface. Improper skylight flashing is a top cause of roof leaks.
5 Key Roof Flashing Materials
Not all flashing is created equal. The material used plays a big role in durability and long-term performance. Here are five of the most commonly used roof flashing materials:
- Aluminum: Lightweight, affordable, and corrosion-resistant, aluminum is easy to bend and install. It must be coated if used near treated lumber to prevent chemical reactions.
- Galvanized Steel: Strong and durable, galvanized steel is often used in residential roofing. It resists rust and handles temperature extremes well.
- Copper: A premium flashing material, copper is naturally corrosion-resistant and develops a beautiful patina over time. It’s often used on high-end or historic homes.
- Lead: Still used in some regions for its malleability and long lifespan, especially around chimneys or masonry.
- Rubber or Plastic: Used primarily for vent boots and some skylight flashing. These materials are flexible but may wear down faster than metal options.
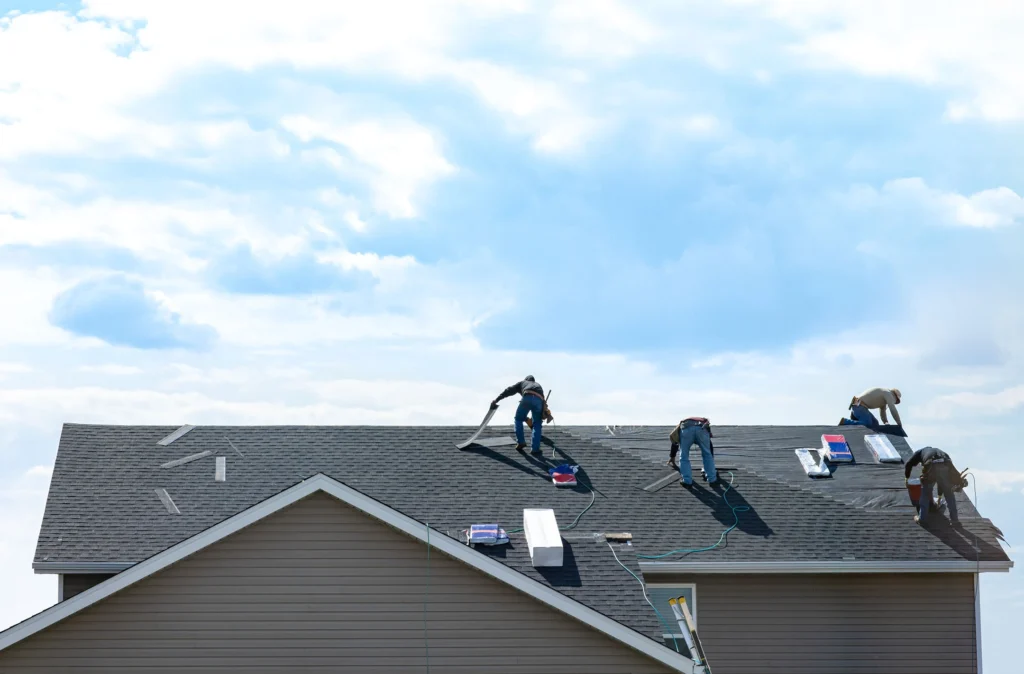
Roof Flashing Installation Best Practices
Professional installation is critical to roof flashing performance. At Capstone Roofing, we follow manufacturer guidelines and proven techniques to ensure flashing does its job from day one.
Integration With Roofing Layers
Flashing isn’t simply nailed into place—it must be layered correctly with the shingles and underlayment to create a watertight barrier. For example, step flashing is installed beneath each row of shingles along vertical walls, not over them.
Use of Roofing Cement or Sealant
While metal is the primary line of defense, flashing is often sealed with high-quality roofing cement or caulking in critical joints or hard-to-reach areas. However, we avoid over-relying on sealants since metal-to-shingle integration should do most of the work.
Proper Sizing and Overlap
Flashing must be long and wide enough to overlap both the wall or feature it’s sealing and the roofing material. Overlap between flashing pieces is also important—usually 2–4 inches to ensure water doesn’t sneak through joints.
Secure Fastening Without Warping
Nails should be driven in flat, without over-penetrating or causing the flashing to warp. Warping or buckling flashing creates gaps where water can collect and seep in.
Signs of Roof Flashing Problems
Over time, flashing can deteriorate, pull away, or fail. Regular roof inspections help catch issues before they become major problems. Here are some warning signs:
- Water stains inside your home: Often around chimneys, skylights, or walls—key flashing zones.
- Visible rust or corrosion: Especially on older galvanized steel flashing.
- Loose or missing flashing: Flashing that has peeled back or blown off can leave large gaps.
- Cracked or dried sealant: Caulking used around flashing edges can degrade over time.
- Sagging roof valleys: May indicate valley flashing failure or water intrusion beneath shingles.
Noticing any of these warning signs is a clear indicator that your roof’s integrity may be compromised. While a simple visual check can help, a professional is needed to thoroughly diagnose the problem.
Protect Your Home With Proper Flashing
Roof flashing may be out of sight, but it should never be out of mind. Whether you’re replacing a roof, fixing a leak, or installing a new feature like a skylight, proper flashing is key to long-term protection. At Capstone Roofing, we treat every flashing detail with the attention it deserves—because we know a roof is only as strong as its weakest point.
Don’t wait until a leak reveals the problem. Contact Capstone Roofing today for a free estimate and expert guidance for your roofing project.


4.8 RATING
5.0 RATING
A+ RATING