How to Remove Moss From Roof: 7 Fast & Easy Steps
If you have been searching how to remove moss from roof surfaces safely without causing additional damage, we are here to help. At Capstone Roofing Inc., we have seen how quickly moss can transform from a small green patch into a serious threat to a home’s roofing system. Moss traps moisture against shingles, lifts the edges of shingles over time, and accelerates wear that can shorten the life of an otherwise healthy roof. Both moss and algae growth can occur on roofs, especially shingle roofs such as asphalt shingles, but they are different organisms, algae is a simple aquatic organism that mainly affects the appearance of shingles, while moss is a non-vascular plant that can cause physical damage by lifting or curling shingles. This lifting increases the risk of shingle blow-off during wind events, making wind damage a contributing factor, as wind can also spread moss and algae spores and worsen roof integrity. According to Oregon State University, moss growth may reduce the lifespan of your roof, and the sooner you act, the cheaper and easier it is to manage. Acting early protects the roof, the home beneath it, and the homeowner’s wallet.
In this guide, we walk through a safe, proven seven-step process for removing moss from a roof along with key tips for preventing regrowth. We will cover:
- Why moss damages roofs: A clear breakdown of how moss compromises shingles, gutters, and underlying roof structure.
- The seven-step removal process: Each step needed to safely and effectively clear moss without damaging the roofing material.
- How to prevent future growth: Long-term strategies that keep moss from returning after the initial cleanup is complete.
Why Moss on a Roof Is a Problem Worth Addressing
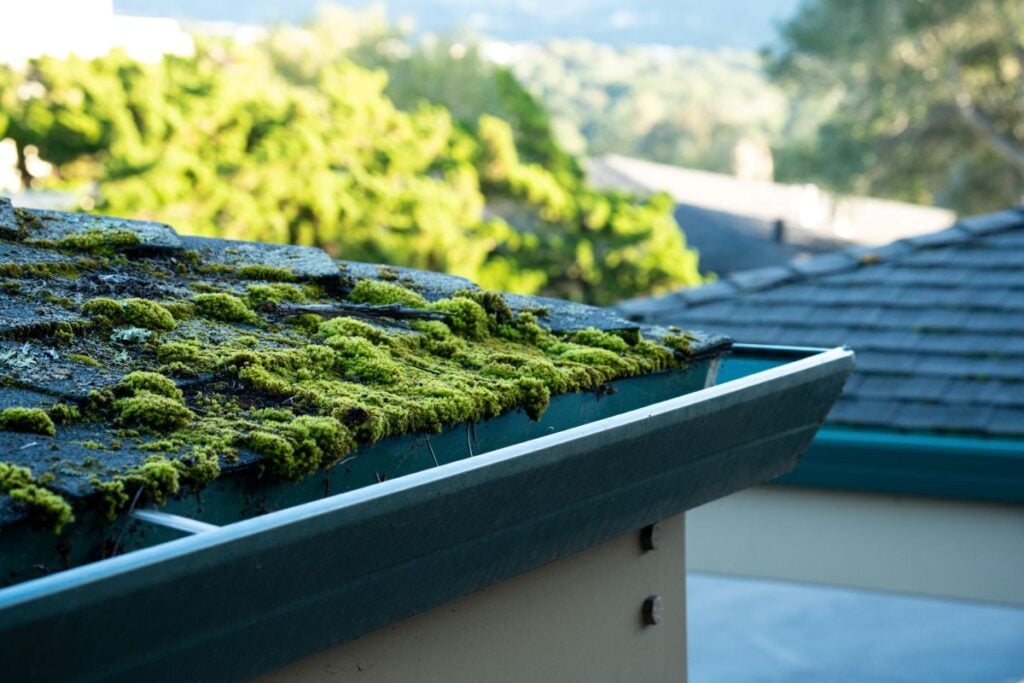
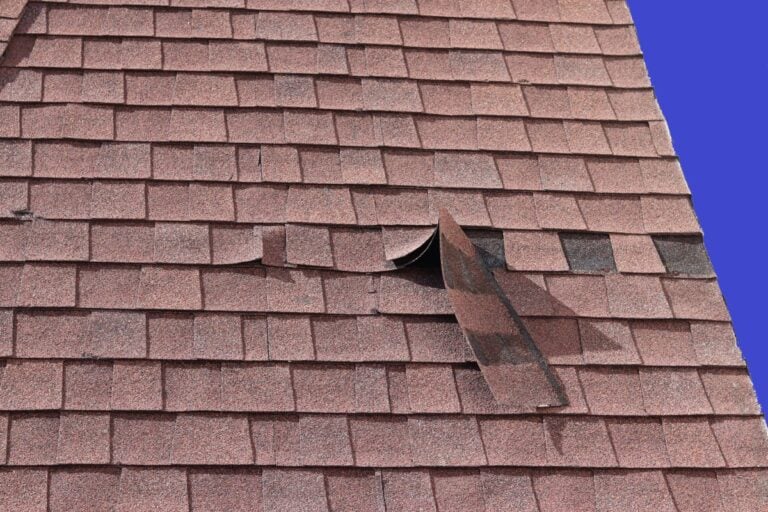
Moss is more than a cosmetic nuisance. Unlike algae, moss is a non-vascular plant that absorbs water through its leaves rather than a root system, which is why it thrives in moist environments. It absorbs water and holds it directly against the shingles, creating constant moisture exposure that no roofing material is designed to handle. Over time, this trapped moisture works its way under shingle edges, causing them to lift, curl, and eventually crack. Lifted shingles are also more susceptible to wind damage, as they can be blown off more easily. We have inspected too many roofs where what started as a thin green layer ended in granule loss, leaks, and a roof that needed replacing years ahead of schedule.
How Moss Damages Shingles and Roofing Materials
Moss does its damage slowly but steadily, which is part of why so many homeowners underestimate it. The plant itself is small, but its ability to retain water and physically push under shingle edges makes it a real threat to roof integrity. We always recommend addressing moss as soon as it appears, since each season of growth makes removal harder and the underlying damage worse. Even moss that looks dormant continues to hold moisture and accelerate shingle wear.
- Moisture retention: Moss acts like a sponge, holding water against shingles long after rain has stopped and creating constant dampness.
- Shingle lifting: As moss grows, it pushes under shingle edges and gradually lifts them, exposing the layers beneath to wind and water.
- Granule loss: The constant moisture and physical movement strip away the protective granules that shield shingles from ultraviolet damage.
- Underlayment exposure: Once shingles are compromised, water can reach the underlayment and decking, leading to rot and leaks.
Where Moss Grows and Why
Moss thrives in cool, shaded, damp environments, which is why it tends to appear in predictable areas of a roof. Understanding where moss grows helps homeowners spot it early and address the conditions that allow it to take hold. North-facing slopes, sections shaded by overhanging trees, and roofs in regions with high humidity are most at risk. Identifying the contributing factors is the first step in keeping moss from returning after removal.
- North-facing roof slopes: These sections receive the least direct sunlight and stay damp longer than other parts of the roof.
- Areas under tree canopies: Overhanging branches block sunlight, drop debris, and create the consistently moist conditions moss needs.
- Valleys and shaded gutters: Roof valleys and shaded gutter lines collect moisture and debris, providing a perfect environment for moss spores.
- Older or worn shingles: Shingles that have lost granules retain moisture more easily, making them especially vulnerable to moss colonization.
While moss prefers shaded, damp areas, algae growth is more common in humid or coastal climates and can spread rapidly through spores carried by wind or animals. Recognizing the difference in how moss and algae thrive can help you tailor your roof maintenance and prevention strategies.
7 Fast and Easy Steps to Remove Moss From a Roof
Removing moss from a roof requires a careful, methodical approach that protects both the roofing material and the person doing the work. Keeping gutters clean is also a key part of roof maintenance and helps prevent moss and algae growth. Below are the seven steps we follow when clearing moss safely. Each step matters, and skipping any of them increases the risk of damage to the shingles or injury to the homeowner.
1. Choose the Right Day and Prepare for Safety
Roof work is inherently risky, so weather and preparation matter as much as technique. The best conditions for moss removal are dry, overcast, and cool, since wet roofs are dangerously slippery and direct sun makes cleaning solutions evaporate too fast. Before climbing up, we always recommend gathering the necessary equipment and confirming the roof is structurally safe to walk on.
- Weather check: Look for a dry, overcast day with no rain forecast for at least 24 hours after treatment.
- Safety gear: Wear non-slip shoes, a stable harness if possible, safety glasses, and gloves to protect skin from cleaning solutions.
- Ladder placement: Use a sturdy extension ladder placed on level ground with a stabilizer to prevent damage to the gutters.
- Helper on the ground: Always have someone nearby who can call for help, steady the ladder, or hand up tools as needed.
2. Protect Plants, Landscaping, and Surrounding Areas
Moss-killing solutions can damage the plants and grass beneath the roofline if proper precautions are not taken. We always cover landscaping before applying any cleaning product, since runoff will inevitably wash off the roof during the rinsing stage. Taking a few extra minutes to protect the yard prevents the headache of replacing damaged plants later.
- Tarps over plants: Cover shrubs, flower beds, and decorative plants with plastic tarps before any solution is applied.
- Pre-watering vegetation: Water nearby plants thoroughly so their leaves are less likely to absorb runoff chemicals.
- Pet and child safety: Keep pets and children away from the work area until all solutions have been thoroughly rinsed.
- Vehicle protection: Move vehicles, outdoor furniture, and grills well away from the drip zone before starting.
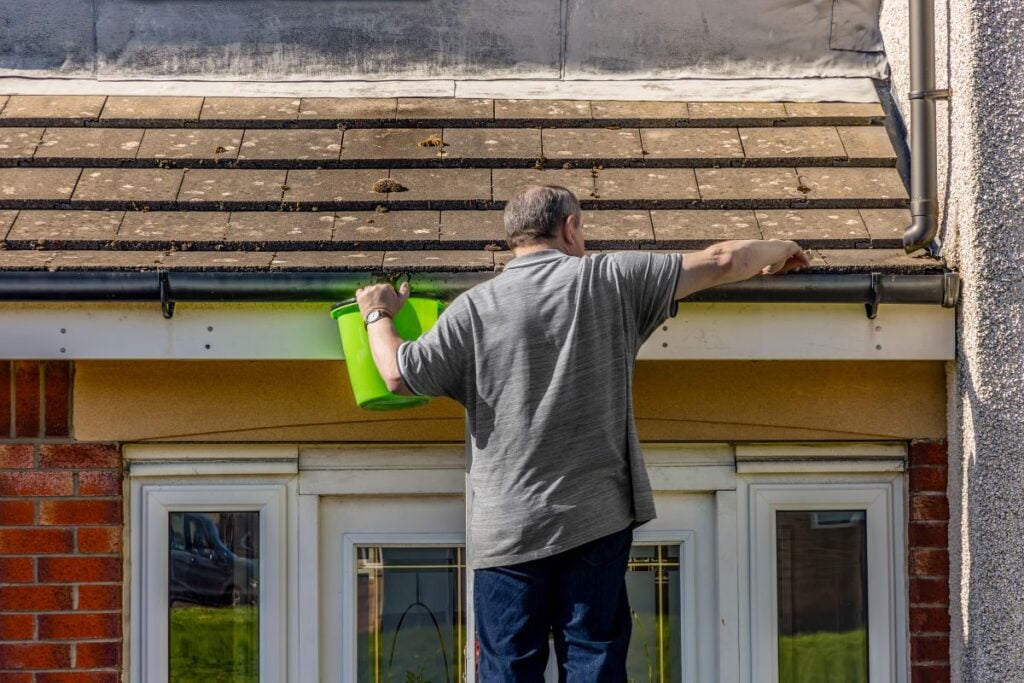
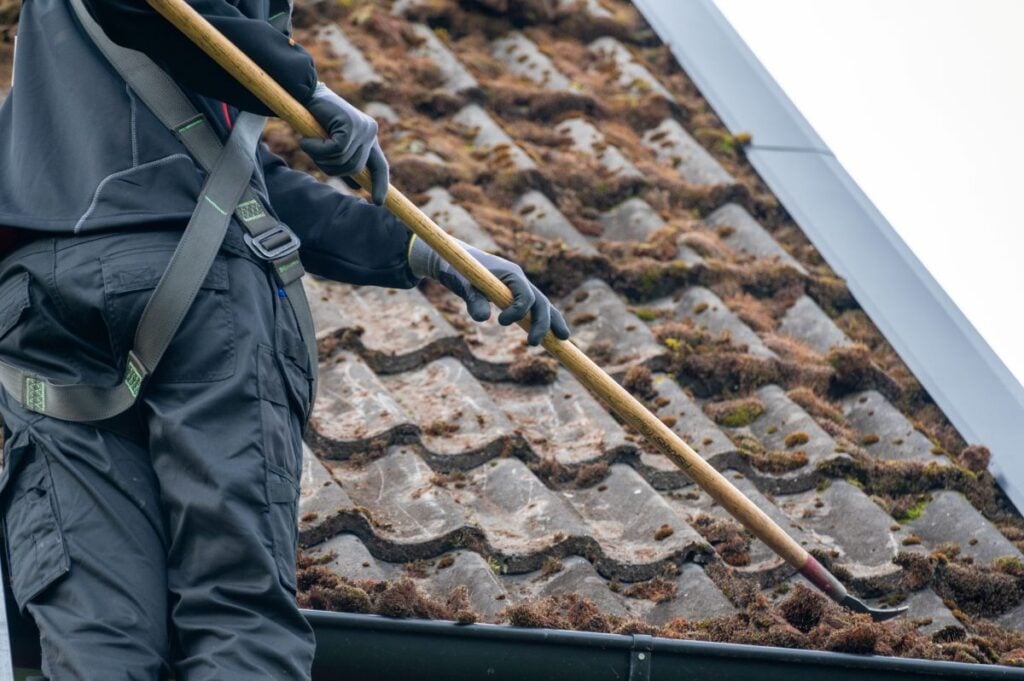
3. Clear Loose Debris From the Roof
Before treating moss, we always clear away any loose debris like leaves, twigs, and pine needles. Debris traps moisture and provides organic material that feeds new moss growth, so removing it improves both the immediate cleaning effort and long-term prevention. A clean starting surface allows the moss treatment to reach the actual moss colonies rather than getting absorbed by debris.
- Soft-bristle brush or stiff broom: Use a long-handled soft-bristle brush or stiff broom to gently sweep away large moss clumps and loose material off the roof surface.
- Leaf blower option: A leaf blower on a low setting can clear debris quickly without disturbing intact shingles. Regularly clearing debris from the roof with a leaf blower or similar non-abrasive method is an important part of a maintenance program to prevent moss and algae growth.
- Gutter cleanout: Clear gutters of leaves and sediment so cleaning runoff has somewhere to drain freely. Keeping gutters clean is essential for proper drainage and helps prevent conditions that encourage moss and algae growth on roofs. Annual inspections and gutter cleaning help catch small patches of moss early and prevent conducive conditions for growth.
- Avoid metal tools: Never use rakes, metal scrapers, or hard tools that can damage shingle granules and surfaces.
4. Apply a Roof-Safe Moss Removal Solution
The right cleaning solution kills moss without damaging shingles when applied correctly. The Asphalt Roofing Manufacturers Association recommends a 50:50 mix of laundry-strength chlorine bleach and water for asphalt shingles. We apply the solution generously and allow it to sit long enough to penetrate the moss, but not so long that it dries on the roof in direct sunlight.
- Mixing the solution: Combine equal parts laundry-strength chlorine bleach and water in a garden sprayer for even application.
- Application coverage: Spray the solution evenly over all moss-covered areas, working from the top of the roof downward.
- Dwell time: Allow the solution to sit for fifteen to twenty minutes so it can fully penetrate the moss.
- Commercial alternatives: Roof-safe moss control products are available if homeowners prefer not to work with bleach.
5. Gently Scrub or Brush Away Dead Moss
Once the solution has had time to work, the moss should be loose enough to remove with a soft-bristle brush. We always brush downward, in the direction the shingles overlap, to avoid lifting their edges. Heavy scrubbing or pressure can strip granules and damage the shingle surface, so a gentle, patient approach delivers the best results.
- Soft-bristle brush: Use a long-handled brush with soft bristles designed for roof cleaning, never a wire brush.
- Downward strokes: Always brush in the direction water flows so shingle edges stay flat and intact.
- Light pressure only: Apply just enough pressure to loosen the moss, since shingles damage easily under heavy scrubbing.
- Patience over force: If moss is stubborn, reapply solution and wait longer rather than scrubbing harder.
6. Rinse the Roof With Low Pressure
After scrubbing, the roof needs a thorough rinse to remove leftover moss debris and cleaning solution. We always use a regular garden hose with a standard nozzle, never a pressure washer, since high pressure damages shingles and blasts away the granules that protect them. Working from the top down ensures runoff carries debris off the roof rather than back onto it.
- Garden hose only: Use standard water pressure with a regular spray nozzle, never a pressure washer on shingles.
- Top-down rinsing: Always rinse from the highest point down so debris flows off rather than getting trapped.
- Thorough coverage: Rinse every area where solution was applied to prevent residue from staining or damaging shingles.
- Final gutter flush: Run water through the gutters and downspouts to clear any remaining moss debris that washed down.
7. Inspect the Roof and Plan for Prevention
Once the roof is dry, the final step is a thorough inspection to identify any damage the moss caused or any shingles that need attention. Spotting problems early prevents bigger issues later. We also use this inspection as a chance to plan preventive measures so the moss does not return next season.
- Shingle check: Look for missing granules, lifted edges, cracks, or curling that may need professional repair.
- Flashing inspection: Check flashing around chimneys, vents, and skylights for any moss-related damage or seal issues.
- Gutter alignment: Confirm gutters and downspouts are still draining properly after the cleaning process.
- Prevention planning: Note any heavily shaded areas that may need tree trimming or zinc strip installation to deter regrowth.
How to Prevent Moss From Coming Back
Removing moss is only half the battle. Without preventive steps, spores will return and the cycle starts over within a year or two. Blue green algae is another common type of algae that can grow on roofs, especially in humid or coastal environments, causing unsightly streaks and stains. Prevention strategies, such as keeping gutters clean and trimming overhanging branches, help control both moss and blue green algae. We always advise homeowners to address the conditions that allowed moss to grow in the first place so the cleaning lasts as long as possible.
Long-Term Prevention Strategies
The most effective prevention combines reducing shade, improving roof drainage, and adding materials that naturally inhibit moss growth. A combination of approaches almost always works better than any single solution. We help homeowners evaluate which methods make the most sense for their specific roof and surroundings, since not every strategy fits every property.
- Trim overhanging branches: Cutting back tree limbs allows more sunlight to reach the roof and dries out potential moss zones.
- Keep gutters clean: Regularly cleaning gutters ensures proper drainage, preventing water buildup that can encourage moss and algae growth.
- Install zinc or copper strips: These metal strips release particles in rainwater that prevent moss from establishing on the surface below.
- Improve attic ventilation: Proper ventilation keeps the roof deck dry from below, reducing the moisture that feeds moss growth.
- Annual roof maintenance: Schedule yearly inspections and cleanings to catch new growth early before it spreads.
Trust Capstone Roofing Inc. for Safe and Effective Moss Removal
A roof represents one of the largest investments a homeowner makes, and protecting it from moss-related damage requires both skill and care. At Capstone Roofing Inc., we bring years of experience handling roofs of every age and material, and we approach each project with the same attention to detail we would give our own homes. Our team understands how to remove moss from roof surfaces safely, identify any damage hiding beneath the green growth, and recommend prevention strategies that actually work for the specific roof we are caring for. We pride ourselves on honest assessments, transparent pricing, and workmanship that protects homes for years to come. If moss has appeared on your roof and you are unsure how to handle it safely, we are ready to help. Contact Capstone Roofing Inc. today for a free estimate and expert guidance from a team you can trust.
Recent Articles
Roofing Tips & Tricks

4.8 RATING
5.0 RATING
A+ RATING